• Eggnog Ice Cream

    Rich and Creamy Homemade Eggnog Ice Cream with Warm Spices

    Ingredients:

    2 cups heavy cream

    1 cup whole milk

    3/4 cup granulated sugar

    1 cup store-bought or homemade eggnog

    1/4 teaspoon ground nutmeg

    1/4 teaspoon ground cinnamon

    1 teaspoon pure vanilla extract

    Pinch of salt

    Optional: 1–2 tablespoons bourbon or rum (for an adult version)

    Directions:

    In a large mixing bowl, whisk together heavy cream, whole milk, sugar, eggnog, nutmeg, cinnamon, vanilla, and salt until well combined and the sugar is dissolved.

    Chill the mixture in the refrigerator for at least 4 hours or overnight, until very cold.

    Pour the chilled base into your ice cream maker and churn according to manufacturer’s instructions (usually 20–25 minutes).

    If desired, fold in bourbon or rum during the last few minutes of churning for a boozy holiday twist.

    Transfer the ice cream to a freezer-safe container and freeze for at least 4 hours until firm.

    Serve scooped with a sprinkle of cinnamon or crushed gingersnap cookies.

    Prep Time: 10 minutes + chill/freeze time | Churn Time: 25 minutes | Total Time: approx. 6 hours
    Kcal: 305 kcal per serving | Servings: 6 servings

    #eggnogicecream #holidaydesserts #homemadeicecream #christmasicecream #spicedicecream #festivedesserts #easyfrozendessert #wintericecream #nogicecream #vanillaandnutmeg #holidayflavors #icecreamtok #icecreamseason #creamyholidaydessert #boozyicecream #homemadetreats #frozendelight #comfortindessert #icecreamdream #wintertreats

    Capture holiday cheer in every scoop! This Eggnog Ice Cream is rich, creamy, and filled with festive spices—perfect for winter celebrations.
    Eggnog Ice Cream Rich and Creamy Homemade Eggnog Ice Cream with Warm Spices Ingredients: 2 cups heavy cream 1 cup whole milk 3/4 cup granulated sugar 1 cup store-bought or homemade eggnog 1/4 teaspoon ground nutmeg 1/4 teaspoon ground cinnamon 1 teaspoon pure vanilla extract Pinch of salt Optional: 1–2 tablespoons bourbon or rum (for an adult version) Directions: In a large mixing bowl, whisk together heavy cream, whole milk, sugar, eggnog, nutmeg, cinnamon, vanilla, and salt until well combined and the sugar is dissolved. Chill the mixture in the refrigerator for at least 4 hours or overnight, until very cold. Pour the chilled base into your ice cream maker and churn according to manufacturer’s instructions (usually 20–25 minutes). If desired, fold in bourbon or rum during the last few minutes of churning for a boozy holiday twist. Transfer the ice cream to a freezer-safe container and freeze for at least 4 hours until firm. Serve scooped with a sprinkle of cinnamon or crushed gingersnap cookies. Prep Time: 10 minutes + chill/freeze time | Churn Time: 25 minutes | Total Time: approx. 6 hours Kcal: 305 kcal per serving | Servings: 6 servings #eggnogicecream #holidaydesserts #homemadeicecream #christmasicecream #spicedicecream #festivedesserts #easyfrozendessert #wintericecream #nogicecream #vanillaandnutmeg #holidayflavors #icecreamtok #icecreamseason #creamyholidaydessert #boozyicecream #homemadetreats #frozendelight #comfortindessert #icecreamdream #wintertreats Capture holiday cheer in every scoop! This Eggnog Ice Cream is rich, creamy, and filled with festive spices—perfect for winter celebrations.
    Like
    Love
    Wow
    3
    · 0 Comentários ·0 Compartilhamentos ·58K Visualizações ·0 Anterior
  • Honey Vanilla Ice Cream

    Silky Honey Vanilla Ice Cream with a Naturally Sweet Touch

    Ingredients:

    2 cups heavy cream

    1 cup whole milk

    1/2 cup honey (preferably wildflower or clover)

    1 tablespoon pure vanilla extract (or 1 vanilla bean, split and scraped)

    Pinch of sea salt

    Directions:

    In a medium saucepan over medium heat, combine the heavy cream, milk, and honey. Stir gently until the honey is fully dissolved and the mixture is hot but not boiling.

    Remove from heat. Stir in the vanilla extract (or add the scraped vanilla bean and pod for deeper flavor) and a pinch of sea salt.

    Let the mixture cool to room temperature. If using a vanilla bean pod, remove it before chilling.

    Cover and refrigerate the base for at least 4 hours or overnight until thoroughly chilled.

    Pour the cold mixture into your ice cream maker and churn according to the manufacturer's instructions (typically 20–25 minutes).

    Transfer the soft ice cream into a freezer-safe container and freeze for at least 4 hours, or until firm and scoopable.

    Serve as-is or with drizzled honey and crushed nuts for an elegant finish.

    Prep Time: 10 minutes + chilling/freezing time | Churn Time: 25 minutes | Total Time: approx. 6 hours
    Kcal: 290 kcal per serving | Servings: 6 servings

    #honeyvanillaicecream #homemadeicecream #naturalhoney #vanillabeanicecream #easyfrozendesserts #icecreamfromscratch #summerdesserts #refinedsugarfree #creamyicecream #honeylovers #sweettoothfix #icecreamtok #dairyicecream #wildflowerhoney #icecreamrecipe #simpleindulgence #freezerfriendly #scoopszn #honeydessert #vanillaglow

    Naturally sweet, totally creamy, and full of cozy vanilla flavor This Honey Vanilla Ice Cream is as dreamy as it gets!
    Honey Vanilla Ice Cream Silky Honey Vanilla Ice Cream with a Naturally Sweet Touch Ingredients: 2 cups heavy cream 1 cup whole milk 1/2 cup honey (preferably wildflower or clover) 1 tablespoon pure vanilla extract (or 1 vanilla bean, split and scraped) Pinch of sea salt Directions: In a medium saucepan over medium heat, combine the heavy cream, milk, and honey. Stir gently until the honey is fully dissolved and the mixture is hot but not boiling. Remove from heat. Stir in the vanilla extract (or add the scraped vanilla bean and pod for deeper flavor) and a pinch of sea salt. Let the mixture cool to room temperature. If using a vanilla bean pod, remove it before chilling. Cover and refrigerate the base for at least 4 hours or overnight until thoroughly chilled. Pour the cold mixture into your ice cream maker and churn according to the manufacturer's instructions (typically 20–25 minutes). Transfer the soft ice cream into a freezer-safe container and freeze for at least 4 hours, or until firm and scoopable. Serve as-is or with drizzled honey and crushed nuts for an elegant finish. Prep Time: 10 minutes + chilling/freezing time | Churn Time: 25 minutes | Total Time: approx. 6 hours Kcal: 290 kcal per serving | Servings: 6 servings #honeyvanillaicecream #homemadeicecream #naturalhoney #vanillabeanicecream #easyfrozendesserts #icecreamfromscratch #summerdesserts #refinedsugarfree #creamyicecream #honeylovers #sweettoothfix #icecreamtok #dairyicecream #wildflowerhoney #icecreamrecipe #simpleindulgence #freezerfriendly #scoopszn #honeydessert #vanillaglow Naturally sweet, totally creamy, and full of cozy vanilla flavor This Honey Vanilla Ice Cream is as dreamy as it gets!
    Like
    Love
    Wow
    3
    · 0 Comentários ·0 Compartilhamentos ·58K Visualizações ·0 Anterior
  • Tangerine Ice Cream

    Creamy Tangerine Dream Ice Cream

    Ingredients:

    2 cups heavy cream

    1 cup whole milk

    3/4 cup granulated sugar

    Zest of 3 tangerines

    1 cup fresh tangerine juice (about 4-5 tangerines)

    4 large egg yolks

    1 teaspoon vanilla extract

    Directions:

    In a medium saucepan, combine the milk, cream, and half the sugar. Warm over medium heat until just about to simmer.

    In a separate bowl, whisk the egg yolks with the remaining sugar until pale and thick.

    Slowly pour the warm milk mixture into the egg yolks, whisking constantly to temper the eggs.

    Return the mixture to the saucepan and cook over low heat, stirring constantly, until it thickens enough to coat the back of a spoon (about 170°F / 77°C). Do not boil.

    Remove from heat and stir in the tangerine juice, zest, and vanilla extract.

    Strain the mixture through a fine sieve to remove zest and any curdled bits.

    Chill the custard thoroughly in the refrigerator, at least 4 hours or overnight.

    Pour the custard into an ice cream maker and churn according to manufacturer’s instructions until soft-serve consistency.

    Transfer to a container and freeze for at least 2 hours to firm up before serving.

    Prep Time: 20 minutes | Chill Time: 4 hours+ | Churn Time: 20-30 minutes | Total Time: 5 hours
    Kcal: 250 kcal per serving (1/2 cup) | Servings: 6 servings

    #tangerineicecream #citrusdessert #homemadeicecream #creamyicecream #summerdesserts #freshfruiticecream #citrusflavors #frozendesserts #easyicecreamrecipe #dessertlover #sweetandsour #fruiticecream #cooltreats #icecreamtime #custardbase #handmadeicecream #freshandfruity #dessertideas #coolandsmooth #icecreamrecipe

    Brighten your day with this refreshing Tangerine Ice Cream! Creamy, tangy, and bursting with fresh citrus flavor.
    Tangerine Ice Cream Creamy Tangerine Dream Ice Cream Ingredients: 2 cups heavy cream 1 cup whole milk 3/4 cup granulated sugar Zest of 3 tangerines 1 cup fresh tangerine juice (about 4-5 tangerines) 4 large egg yolks 1 teaspoon vanilla extract Directions: In a medium saucepan, combine the milk, cream, and half the sugar. Warm over medium heat until just about to simmer. In a separate bowl, whisk the egg yolks with the remaining sugar until pale and thick. Slowly pour the warm milk mixture into the egg yolks, whisking constantly to temper the eggs. Return the mixture to the saucepan and cook over low heat, stirring constantly, until it thickens enough to coat the back of a spoon (about 170°F / 77°C). Do not boil. Remove from heat and stir in the tangerine juice, zest, and vanilla extract. Strain the mixture through a fine sieve to remove zest and any curdled bits. Chill the custard thoroughly in the refrigerator, at least 4 hours or overnight. Pour the custard into an ice cream maker and churn according to manufacturer’s instructions until soft-serve consistency. Transfer to a container and freeze for at least 2 hours to firm up before serving. Prep Time: 20 minutes | Chill Time: 4 hours+ | Churn Time: 20-30 minutes | Total Time: 5 hours Kcal: 250 kcal per serving (1/2 cup) | Servings: 6 servings #tangerineicecream #citrusdessert #homemadeicecream #creamyicecream #summerdesserts #freshfruiticecream #citrusflavors #frozendesserts #easyicecreamrecipe #dessertlover #sweetandsour #fruiticecream #cooltreats #icecreamtime #custardbase #handmadeicecream #freshandfruity #dessertideas #coolandsmooth #icecreamrecipe Brighten your day with this refreshing Tangerine Ice Cream! Creamy, tangy, and bursting with fresh citrus flavor.
    Like
    Love
    Wow
    3
    · 0 Comentários ·0 Compartilhamentos ·53K Visualizações ·0 Anterior
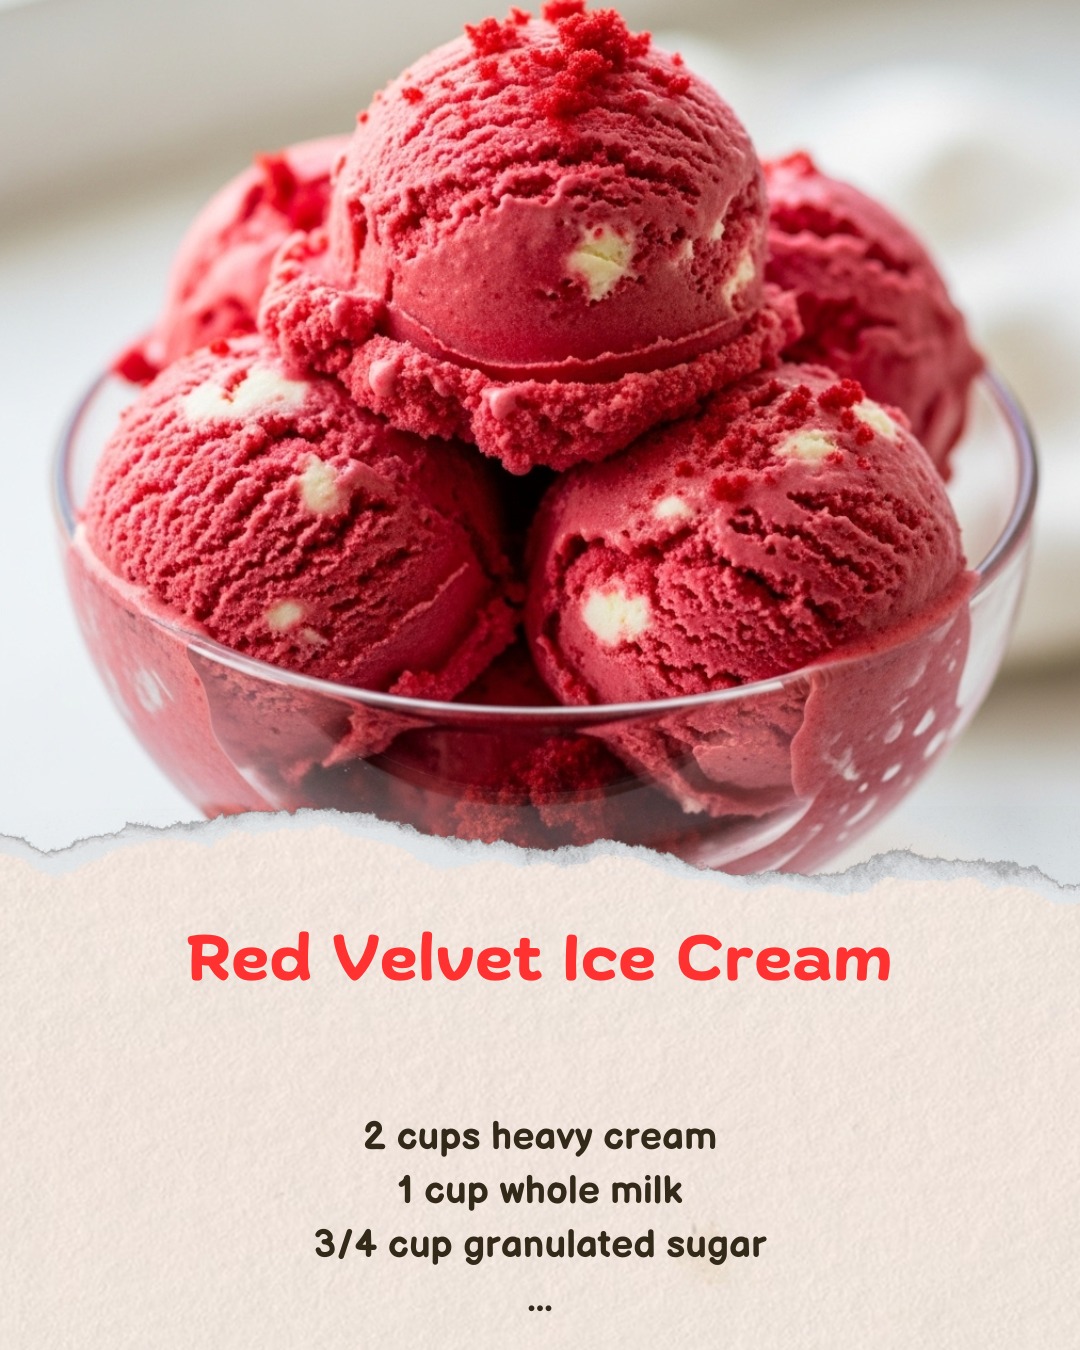
  • Red Velvet Ice Cream

    Luscious Red Velvet Ice Cream with Cream Cheese Swirl

    Ingredients:

    2 cups heavy cream

    1 cup whole milk

    3/4 cup granulated sugar

    1 tablespoon unsweetened cocoa powder

    2 teaspoons red food coloring (or natural beet powder)

    1 teaspoon vanilla extract

    1/2 teaspoon apple cider vinegar

    1/2 teaspoon salt

    1/2 cup buttermilk

    4 oz cream cheese, softened

    2 tablespoons powdered sugar

    Directions:

    In a medium saucepan, whisk together the cream, milk, granulated sugar, cocoa powder, and salt over medium heat until the sugar is fully dissolved. Do not boil.

    Remove from heat and stir in red food coloring, vanilla extract, vinegar, and buttermilk. Chill the mixture in the refrigerator for at least 4 hours or overnight.

    While the base chills, beat the softened cream cheese with powdered sugar until smooth. Chill until ready to swirl into ice cream.

    Once the base is fully chilled, churn in an ice cream maker according to the manufacturer’s instructions.

    When the ice cream reaches soft-serve consistency, gently fold in dollops of the cream cheese mixture to create a swirl effect.

    Transfer to a container and freeze for 4–6 hours or until firm. Scoop and serve!

    Prep Time: 20 minutes | Chilling/Freezing Time: 6 hours | Total Time: 6 hours 20 minutes
    Kcal: 310 kcal | Servings: 6 servings

    #redvelvet #icecreamrecipe #homemadeicecream #dessertgoals #frozendessert #valentinesdessert #creamcheeseicecream #icecreamlovers #sweettoothfix #gourmeticecream #churnedicecream #buttermilkrecipes #classicdesserts #colorfuldesserts #indulgenttreats #dessertcreations #southernflavors #velveticecream #swirledicecream #summerdesserts

    Creamy, dreamy, and bursting with rich red velvet flavor! This Red Velvet Ice Cream is everything you love about the cake — now frozen.
    Red Velvet Ice Cream Luscious Red Velvet Ice Cream with Cream Cheese Swirl Ingredients: 2 cups heavy cream 1 cup whole milk 3/4 cup granulated sugar 1 tablespoon unsweetened cocoa powder 2 teaspoons red food coloring (or natural beet powder) 1 teaspoon vanilla extract 1/2 teaspoon apple cider vinegar 1/2 teaspoon salt 1/2 cup buttermilk 4 oz cream cheese, softened 2 tablespoons powdered sugar Directions: In a medium saucepan, whisk together the cream, milk, granulated sugar, cocoa powder, and salt over medium heat until the sugar is fully dissolved. Do not boil. Remove from heat and stir in red food coloring, vanilla extract, vinegar, and buttermilk. Chill the mixture in the refrigerator for at least 4 hours or overnight. While the base chills, beat the softened cream cheese with powdered sugar until smooth. Chill until ready to swirl into ice cream. Once the base is fully chilled, churn in an ice cream maker according to the manufacturer’s instructions. When the ice cream reaches soft-serve consistency, gently fold in dollops of the cream cheese mixture to create a swirl effect. Transfer to a container and freeze for 4–6 hours or until firm. Scoop and serve! Prep Time: 20 minutes | Chilling/Freezing Time: 6 hours | Total Time: 6 hours 20 minutes Kcal: 310 kcal | Servings: 6 servings #redvelvet #icecreamrecipe #homemadeicecream #dessertgoals #frozendessert #valentinesdessert #creamcheeseicecream #icecreamlovers #sweettoothfix #gourmeticecream #churnedicecream #buttermilkrecipes #classicdesserts #colorfuldesserts #indulgenttreats #dessertcreations #southernflavors #velveticecream #swirledicecream #summerdesserts Creamy, dreamy, and bursting with rich red velvet flavor! This Red Velvet Ice Cream is everything you love about the cake — now frozen.
    Like
    Love
    Wow
    3
    · 0 Comentários ·0 Compartilhamentos ·50K Visualizações ·0 Anterior
  • Caramelized Banana Ice Cream

    Creamy Caramelized Banana Ice Cream with Golden Brown Sugar Swirls

    Ingredients:

    3 ripe bananas, sliced

    2 tablespoons unsalted butter

    1/3 cup brown sugar

    1 tablespoon dark rum or 1 teaspoon vanilla extract (optional)

    2 cups heavy cream

    1 cup whole milk

    1/2 cup granulated sugar

    4 large egg yolks

    1/4 teaspoon salt

    Optional: crushed candied pecans or caramel drizzle for topping

    Directions:

    In a skillet over medium heat, melt the butter and add sliced bananas and brown sugar. Cook for 6–8 minutes until bananas are soft and caramelized. Stir in rum or vanilla and cook for 1 more minute. Let cool completely.

    In a saucepan, heat milk and cream until just steaming. Do not boil.

    In a separate bowl, whisk egg yolks and granulated sugar until pale and thick.

    Gradually pour the hot milk mixture into the yolks while whisking to temper. Return to the saucepan.

    Cook over medium-low heat, stirring constantly, until thickened and coats the back of a spoon (about 5–7 minutes). Remove from heat and strain through a fine mesh sieve.

    Blend the cooled caramelized banana mixture until smooth, then stir it into the custard base. Add salt.

    Chill mixture in the refrigerator for at least 4 hours or overnight.

    Churn in an ice cream maker according to manufacturer’s instructions.

    Freeze for at least 4 hours until firm. Serve with optional toppings.

    Prep Time: 25 minutes | Cooking Time: 15 minutes | Freezing Time: 6 hours | Total Time: 6 hours 40 minutes
    Kcal: 340 kcal | Servings: 6 servings

    #caramelizedbanana #bananaicecream #homemadeicecream #creamybanana #caramelflavor #icecreamtreats #bananaandcream #frozendesserts #dessertideas #custardicecream #fruitbasedicecream #gourmeticecream #icecreamobsession #bananalover #sweetindulgence #carameldream #easyhomemadedessert #summericecream #custardcreations #frozentwist

    Meet your new favorite scoop: Caramelized Banana Ice Cream. Silky, sweet, and swirling with golden banana goodness!
    Caramelized Banana Ice Cream Creamy Caramelized Banana Ice Cream with Golden Brown Sugar Swirls Ingredients: 3 ripe bananas, sliced 2 tablespoons unsalted butter 1/3 cup brown sugar 1 tablespoon dark rum or 1 teaspoon vanilla extract (optional) 2 cups heavy cream 1 cup whole milk 1/2 cup granulated sugar 4 large egg yolks 1/4 teaspoon salt Optional: crushed candied pecans or caramel drizzle for topping Directions: In a skillet over medium heat, melt the butter and add sliced bananas and brown sugar. Cook for 6–8 minutes until bananas are soft and caramelized. Stir in rum or vanilla and cook for 1 more minute. Let cool completely. In a saucepan, heat milk and cream until just steaming. Do not boil. In a separate bowl, whisk egg yolks and granulated sugar until pale and thick. Gradually pour the hot milk mixture into the yolks while whisking to temper. Return to the saucepan. Cook over medium-low heat, stirring constantly, until thickened and coats the back of a spoon (about 5–7 minutes). Remove from heat and strain through a fine mesh sieve. Blend the cooled caramelized banana mixture until smooth, then stir it into the custard base. Add salt. Chill mixture in the refrigerator for at least 4 hours or overnight. Churn in an ice cream maker according to manufacturer’s instructions. Freeze for at least 4 hours until firm. Serve with optional toppings. Prep Time: 25 minutes | Cooking Time: 15 minutes | Freezing Time: 6 hours | Total Time: 6 hours 40 minutes Kcal: 340 kcal | Servings: 6 servings #caramelizedbanana #bananaicecream #homemadeicecream #creamybanana #caramelflavor #icecreamtreats #bananaandcream #frozendesserts #dessertideas #custardicecream #fruitbasedicecream #gourmeticecream #icecreamobsession #bananalover #sweetindulgence #carameldream #easyhomemadedessert #summericecream #custardcreations #frozentwist Meet your new favorite scoop: Caramelized Banana Ice Cream. Silky, sweet, and swirling with golden banana goodness!
    Like
    Love
    Wow
    3
    · 0 Comentários ·0 Compartilhamentos ·50K Visualizações ·0 Anterior
Páginas Impulsionadas